
Let's Get Close up Part 2:
In Let’s Get Close Up Part I, I introduced the extension tube as an easy and inexpensive way to focus closer on your subject with any lens you own. The post discussed how to achieve a 1:1 ratio or life size magnification (that’s close up!) using the appropriate extension tube and focal length combination. Macro lenses, filters and stacking or reversing lenses are other great alternatives, but which ever method you choose as you achieve greater and greater magnification ratios the more stability you need in the whole camera system and in your technique if you want tack sharp images.
Let’s consider the camera system first and then discuss stabilizing the subject.
Camera System Stability
A tripod is the foundation for any camera system and a sturdy professional tripod gives us the stability that we need when shooting close up. The “ACME brand” selling for around $40 invites camera movement, which leads to frustration and you guessed it, blurry photographs. Afford yourself a good one and happiness will prevail. If you’re looking to replace one or if it’s a new purchase consider a tripod that allow the legs to lay flat… meaning adjusts so the mounted camera sits closer to the ground. This gives you a much better perspective with shorter subjects.


Cable or wireless shutter release activates the shutter without touching the camera. *Pushing the shutter release button on the camera moves the camera slightly and this movement will be amplified exponentially at higher and higher magnification ratios. Your camera’s timer does essentially the same thing, except for the inconvenience of not having the ability to shoot at a specific moment in time, which may be important. Like this very short moment when a mayfly reached out from the plant stem with just one little tiny leg.

Mirror Up Mode. This DSLR camera function is critical to stabilizing the system at high magnification. The mirror up mode allows us to shoot without the mirror releasing up before the shutter opens, which minimizes vibration. If you’re shooting in Live View mode the mirror is already up… presto!
The Mirror Up mode on my Nikon is accessible on top of the camera. Unfortunately not all camera’s have this function. Reference your manual to find yours.
Lens collars are typically found on longer focal length lenses including the longer macro lenses. Using the collar balances the weight of the camera body and lens over the center of the tripod. Most lens manufacturers include the collar, but if not, get one. You might not think it makes that much difference with regards to stability, but believe me it does.

Stabilizing the camera bullet points:
Sturdy tripod
Cable or wireless shutter release
Mirror up Mode
Lens Collar
It’s fairly rare to be out shooting in the natural environment and have no wind at all. In most cases even on the calm days, subtle wind creates movement in most plants. That includes all those beautiful flowers everyone loves to capture close up. Those six and eight legged little critters always seem to be on the move as well. Here are just a few suggestions to help stabilize those little subjects that like to move.
Subject Stability
Paying attention to a weather forecast is certainly advantageous. I’m pretty sure I wouldn’t even consider venturing out if Hurricane Iris was rolling thru the next day. Calm or 0.0 mph would be a nice forecast to see.
One other weather-related tip that helps if you like to capture dew, frost and or insects is the forecasted spread between temperature and dew point temperature. If these two temperatures are less than a couple degrees apart it’s more likely that dew will form the next morning… yahoo dew!
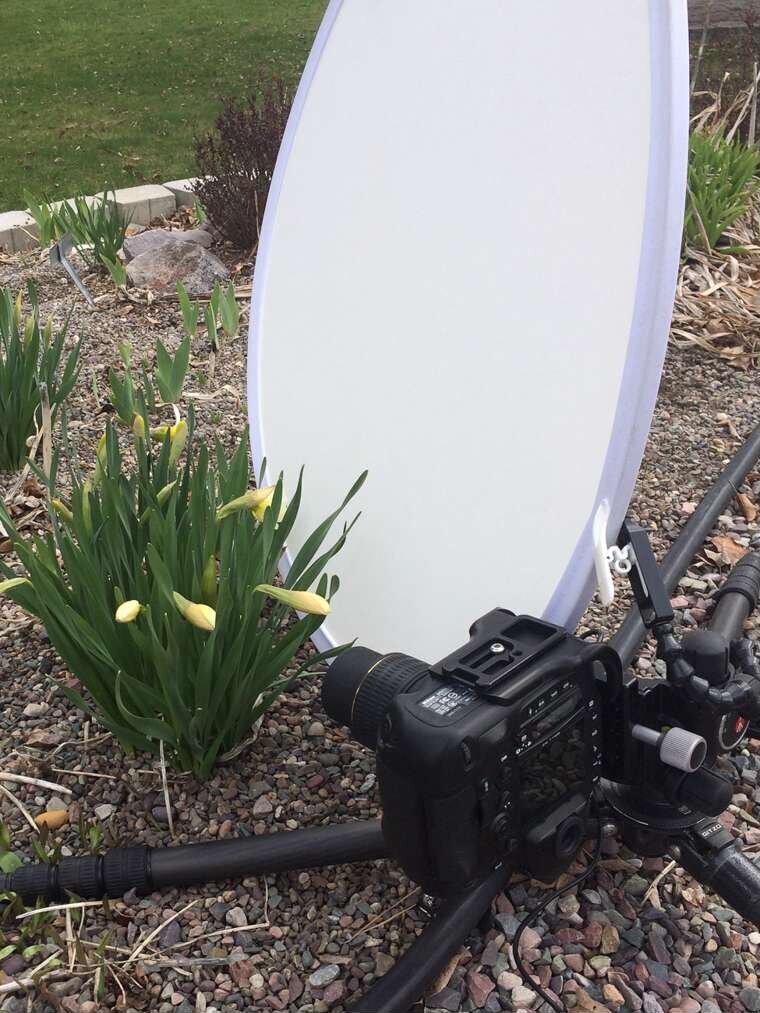
Diffusors and reflectors are important tools for modifying the quality and angle of light, but they also make great windscreens when that annoying little wind subtly moves your subject around. If these aren’t available use your jacket or your camera bag.
Use a Plamp to stabilize your plant subjects. Clay Wimberley invented this clever little tool. One end is designed to clamp onto your tripod and the other end softly clamps and holds your little plant steady. They’re so helpful I always carry two in my close up kit. Plamp, what a clever name!


A light utility string and a few small stakes are useful in some situations. The stakes go in the ground and use the string tied to the stakes to stabilize the plant. These also work great for gently holding other distracting plants out of the foreground or background (known as gardening).
If you like capturing little critters up close and you find they move too much, try this helpful tip… capture the critter in a plastic container with small holes in the top for ventilation (remember when you were a kid) and put it in your refrigerator. When you’re ready to shoot. Simply put the slow moving little bugger where you want it and fire away.

Stabilizing the subject:
Weather forecast
Windscreen (diffusor/reflector)
Plamp
String and stakes
Refrigerator
The important thing to take away from all this is that stability is critical when you’re working really close up to your subject and the closer you get the more critical it is. Be aware, be patient and most importantly have fun getting up close!